Paper crafting is a rewarding hobby that allows for endless creativity, whether you’re making greeting cards, scrapbook pages, or DIY decorations. However, having the right tools can make all the difference in precision, efficiency, and the quality of your finished projects.
In this guide, we’ll explore the must-have paper crafting tools, how to use them, and tips for getting the best results.
1. Essential Cutting Tools
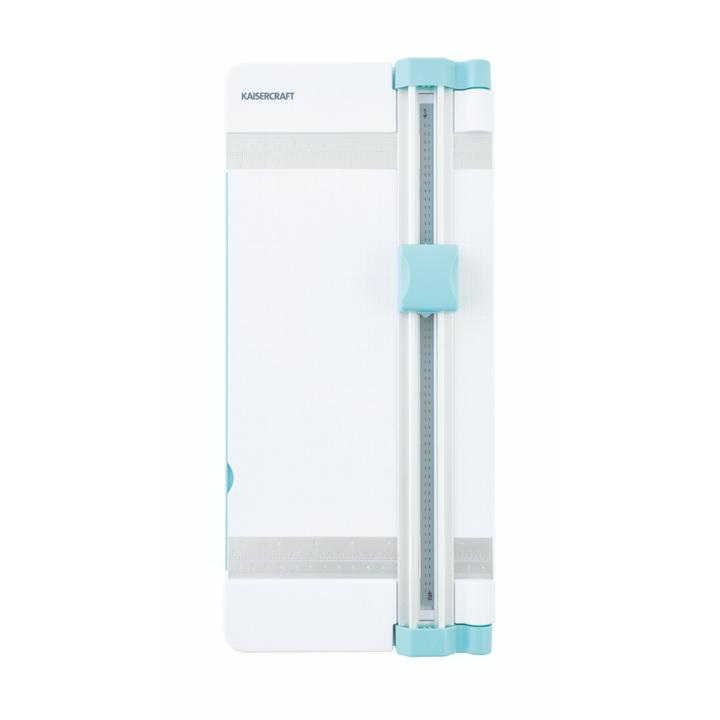
Paper Trimmer
A paper trimmer is an essential tool for clean, straight cuts. It’s especially useful for cutting cardstock, patterned paper, and photo prints.
How to Use It:
- Align your paper with the measurement grid.
- Hold the guide firmly to keep the paper in place.
- Slide the blade down for a precise cut.
Tip: Invest in a trimmer with a replaceable blade to keep your cuts sharp over time.
Precision Craft Knife
For intricate cuts and detailed designs, a craft knife (such as an X-Acto knife) is a must. It allows for freehand cutting and delicate shaping.
How to Use It:
- Use a cutting mat to protect your workspace.
- Hold the knife like a pen and apply gentle pressure.
- Use a ruler for straight cuts or freehand for curved designs.
Tip: Always keep spare blades handy—dull blades can tear paper instead of cutting cleanly.
Scissors
A good pair of sharp, fine-tip scissors is essential for fussy cutting, trimming embellishments, and detailed work.
Best Types of Scissors for Paper Crafting:
- Fine-Tip Scissors – Ideal for cutting intricate designs and small details.
- Decorative Edge Scissors – Create scalloped, zigzag, or wavy edges.
- Heavy-Duty Scissors – Great for cutting thick cardstock or chipboard.
Tip: Clean your scissors regularly to remove adhesive residue and keep the blades sharp.
2. Adhesives for Paper Crafting
Choosing the right adhesive ensures your projects stay intact without wrinkling or damage.
Double-Sided Tape
This is a mess-free, strong adhesive perfect for card-making and layering scrapbook pages.
How to Use It:
- Peel and stick for instant bonding.
- Ideal for securing lightweight embellishments like die cuts and ribbons.
Glue Tape Roller
A tape runner or roller provides an easy, clean way to apply adhesive without drying time.
Tip: Use repositionable glue tape for temporary adhesion when aligning elements.
Liquid Glue
Great for delicate die cuts, small embellishments, and adding texture.
How to Use It:
- Apply sparingly to avoid warping the paper.
- Use a fine-tip applicator for precise control.
Foam Tape & Dots
These add dimension by raising elements off the page, perfect for 3D effects on cards and scrapbooks.
Tip: Trim foam tape into small pieces for intricate embellishments.
3. Embossing & Stamping Tools
Stamping Tools
Rubber stamps and clear acrylic stamps are fantastic for adding designs and messages to paper crafts.
Must-Have Stamping Supplies:
- Acrylic Blocks – Hold clear stamps in place.
- Ink Pads – Choose pigment or dye-based inks for different effects.
- Stamp Cleaner – Helps extend the life of your stamps.
How to Get Crisp Stamped Images:
- Press the stamp evenly into the ink pad.
- Lightly press it onto your paper without rocking.
- Lift the stamp straight up for a clean impression.
Embossing Tools
Embossing adds texture and dimension to paper crafts.
Heat Embossing:
- Requires embossing ink, embossing powder, and a heat gun.
- Stamp your design, sprinkle embossing powder, then use the heat gun to melt it for a raised, glossy effect.
Dry Embossing:
- Uses embossing folders and a die-cutting machine to create textured patterns.
- Simply place your paper inside the folder and run it through the machine for an elegant finish.
Tip: Use anti-static powder before heat embossing to prevent stray powder from sticking where it shouldn’t.
4. Die-Cutting & Punching Tools
Die-Cutting Machines
These machines cut out shapes, letters, and designs with metal dies. Popular brands include Sizzix Big Shot, Cricut, and Spellbinders.
How to Use a Manual Die-Cutting Machine:
- Place your die on top of the paper.
- Sandwich it between cutting plates.
- Roll it through the machine to cut the shape.
Tip: If your die isn’t cutting cleanly, add a shim (extra cardstock) for more pressure.
Handheld Paper Punches
These are simple tools for creating holes, shapes, and decorative edges.
Types of Punches:
- Basic Hole Punches – Create round holes for tags or binding.
- Shape Punches – Cut out hearts, stars, flowers, and more.
- Border Punches – Make decorative edges on paper.
Tip: Sharpen dull punches by punching through aluminium foil a few times.
5. Tools for Adding Colour & Texture
Ink Blending Tools
Ink blending creates soft backgrounds and gradients for cards and scrapbook pages.
How to Use Ink Blending Brushes or Sponges:
- Tap your brush or sponge onto an ink pad.
- Use circular motions to apply ink to your paper.
- Layer colours for a smooth transition.
Watercolour Brushes & Markers
These are great for painting backgrounds, hand-lettering, or adding delicate colour accents.
Tip: Use watercolour paper to prevent warping and get the best blending results.
Stencils
Stencils help add patterns and designs to paper crafts with ink, pastes, or paints.
How to Use Stencils:
- Secure with low-tack tape to keep it in place.
- Apply ink, paint, or texture paste evenly over the design.
- Remove carefully to reveal a crisp pattern.
6. Organisation & Storage Tips for Paper Craft Tools
Keeping your tools organised helps you craft more efficiently.
Best Storage Ideas:
- Use clear containers for stamps, dies, and embellishments.
- Store adhesives upright to prevent leaks and clogs.
- Label drawers for easy access to cutting tools and punches.
- Invest in a craft caddy for frequently used tools.
Tip: Keep a small waste bin near your workspace to quickly dispose of paper scraps.
Final Thoughts: Invest in Quality Tools for Better Crafting
The right tools can transform your paper crafting experience, making it easier and more enjoyable. Whether you’re cutting intricate designs, embossing patterns, or adding vibrant colours, investing in high-quality tools ensures professional results.
Looking to upgrade your crafting toolkit? Visit Paper Creations Papercraft for a range of paper trimmers, die-cutting machines, stamps, adhesives, and everything you need for stunning paper crafts.


