A wedding is a special occasion, and every detail matters—including the invitations. While professionally designed wedding stationery can be expensive, creating your own DIY wedding invitations allows you to add a personal touch while keeping costs down. With the right materials, techniques, and a little creativity, you can design elegant invitations that reflect your style and set the tone for your big day.
In this guide, we’ll walk you through everything you need to know to create stunning DIY wedding invitations, from choosing the right paper to adding embellishments and assembling your invitations.
1. Why Choose DIY Wedding Invitations?
Many couples are opting for DIY wedding invitations because they offer:
✅ Cost Savings – Custom invitations can be expensive, but DIY invitations allow you to control your budget.
✅ Personalisation – You can customise every detail, from colours to fonts and embellishments.
✅ Creative Freedom – Whether you prefer classic, modern, rustic, or minimalist designs, you can create invitations that match your wedding theme.
✅ A Fun Crafting Experience – Making your own wedding invitations can be an enjoyable and rewarding project.
2. Choosing the Right Paper
The type of paper you choose will significantly impact the overall look and feel of your invitations.
Best Paper Types for Wedding Invitations
- Cardstock (250-350gsm) – A thick, sturdy choice for a professional finish.
- Textured Paper – Adds a luxurious feel (e.g., linen, hammered, or pearlised paper).
- Vellum – A translucent overlay that gives an elegant, layered effect.
- Handmade or Recycled Paper – Perfect for a rustic, eco-friendly aesthetic.
Tip: Choose acid-free paper to ensure your invitations remain beautiful over time.
3. Designing Your Invitations
Before you start printing, consider your invitation design.
Key Design Elements
- Font Choice – Elegant script fonts add sophistication, while modern sans-serif fonts create a contemporary look.
- Colour Palette – Match your invitations to your wedding colours for a cohesive theme.
- Layout & Spacing – Keep text legible and well-balanced, with clear sections for details.
- Borders & Frames – Add structure and elegance to your design.
Free & Affordable Design Tools
- Canva – Free online tool with wedding invitation templates.
- Adobe Express – Ideal for creating custom layouts.
- Microsoft Word or PowerPoint – Easy-to-use design software with custom fonts.
Tip: Print a test version of your design before printing in bulk to check for alignment and readability.
4. Printing Options: Home vs Professional Printing
Once your design is finalised, you’ll need to decide how to print your invitations.
Printing at Home
✅ More control over quality and colours
✅ Cost-effective for small batches
✅ Ideal for basic designs without heavy ink coverage
What You’ll Need:
- A high-quality inkjet or laser printer
- Thick cardstock compatible with your printer
- High-resolution settings for crisp text and images
Professional Printing
✅ Best for large quantities
✅ Higher-quality printing options (e.g., foil, letterpress, embossing)
✅ Saves time on cutting and finishing
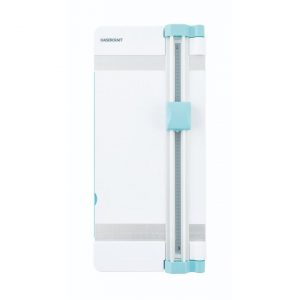
Tip: If you’re printing at home, use a paper trimmer for clean edges and a bone folder for crisp folds.
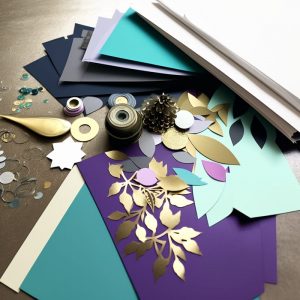
5. Adding Elegant Finishing Touches
Enhance your invitations with beautiful embellishments for a luxurious feel.
Popular Embellishments:
- Foil Accents – Add a metallic touch using foil transfer sheets or gold ink pens.
- Ribbon & Twine – Wrap invitations for a romantic or rustic finish.
- Wax Seals – Create a timeless look with personalised wax stamps.
- Pressed Flowers – Perfect for vintage or botanical-themed weddings.
- Lace or Vellum Overlays – Adds elegance and texture.
Tip: Keep embellishments lightweight to avoid extra postage costs.
6. Envelopes & Presentation
The way you present your invitations makes a lasting impression.
Envelope Options:
- Coloured Envelopes – Match your wedding colour scheme.
- Lined Envelopes – Add a decorative patterned lining for a stylish touch.
- Calligraphy or Printed Labels – Elevate the look with elegant lettering.
- Wax Seals or Stamps – Secure envelopes beautifully.
Tip: If using darker envelopes, opt for white or metallic ink for easy readability.
7. Assembling & Sending Your Invitations
Once your invitations are printed and decorated, it’s time to assemble them.
Checklist for Assembling Your Invitations:
✅ Double-check that all text is legible and correctly aligned.
✅ Stack invitation inserts in the correct order (e.g., RSVP card on top).
✅ Use a bone folder to crease any folded elements neatly.
✅ Weigh an assembled invitation at the post office to determine postage costs.
✅ Mail invitations 8-12 weeks before your wedding date.
Tip: Handwrite or print addresses neatly for a polished look.
8. Bonus: DIY RSVP Cards & Thank You Notes
Complete your wedding stationery suite with DIY RSVP cards and thank-you notes.
DIY RSVP Cards
- Include a reply-by date to help finalise your guest list.
- Offer multiple response options (e.g., meal choices, song requests).
- Use a pre-stamped envelope for easy returns.
DIY Thank You Cards
- Match your invitation design for a cohesive look.
- Personalise each note with a heartfelt message.
- Consider adding a small photo or keepsake from the wedding.
Tip: Send thank-you cards within 2-3 months after your wedding.
Final Thoughts: Make Your Wedding Invitations Uniquely Yours
DIY wedding invitations allow you to create something truly special while staying within budget. By choosing the right materials, designing with care, and adding thoughtful details, you can craft elegant invitations that reflect your personality and wedding theme.
Ready to start your DIY wedding invitations? Visit Paper Creations Papercraft for premium cardstock, embellishments, adhesives, and everything you need to bring your dream wedding invitations to life.